Arizona, Day 1

And so we decamped to Phoenix yesterday for a week of sightseeing and spiritual exploration.  (We in this case meaning my lovely first wife plus our friends Marc and MF.[1])

Our first stop was Flagstaff, which has never popped up on any list of places I wanted to go, but it’s quite a cool little city.  The  downtown is like a smaller version of Asheville: hip, self-aware, revitalized and renovated, with shopping evenly divided between outdoorsy types, New Age Woo types, and artsy types.  How odd that these days I’m all three.

We’re staying at the Hotel Monte Vista, which began the downtown revitalization with its renovation.  The rooms are not luxurious, but they’re nice enough, and the bar/lounge is phenomenal—great craft cocktails and great staff (and luscious coffee in the mornings).

We walked downtown and saw several lovely things that we did not buy, a windchime in particular that had a different and lovely sound.  The store was filled with beautiful soundmaking items: bowls and gongs and tubes and even a sound therapy chair in which you sat and thrilled to the deep thrums of the strings on the outside of it.

They are not open today, alas.  If we come back through Flagstaff next Saturday, I’m stopping and making a few purchases.

Dinner was at the incredible Brix, up the hill from the hotel.  We trudged up there to check it out and were there when it opened exactly at 5:00—and they weren’t sure they could fit us in!  Fortunately they could, and it was divine:

In the foreground, shrimp and grits to die for, and behind that, pork belly on polenta with a beet sauce.  From beginning to end, an exceptional experience.

This morning, we’ll hit the weekend art fair here, then on to the Grand Canyon.

We are travelling in style—when Marc got to the rental counter, the best option was an enormous Chevy Tahoe Suburban LT, the most important attribute of which is not its capaciousness but the multiple outlets for charging phones and iPads.
—————
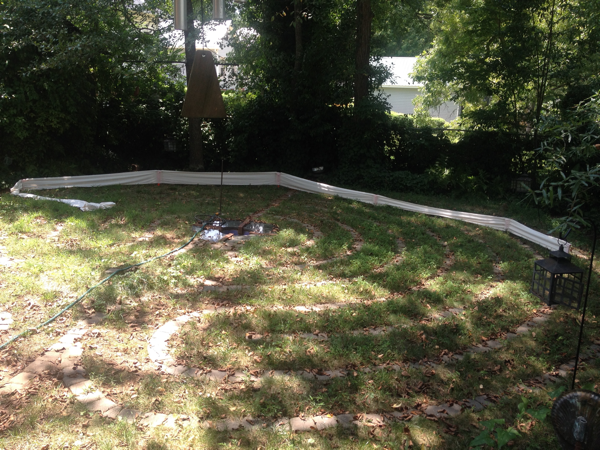
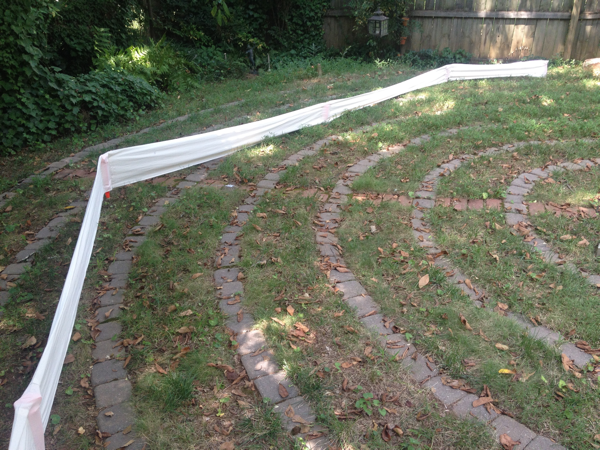
[1] This is the usual disclaimer that we did too leave someone guarding the house so it’s no use planning to break in and steal all the muslin walls for the 3 Old Men labyrinth.  Some of us worry about that.

3 Old Men: Labyrinth walls—the Pleatening

“Dale,” I hear you asking,[1] “I understand that you’ve hemmed six football fields worth of muslin strips…

A football field and a half of handkerchief hemming

“…but how on earth do you do the pleats and create the pockets that the tent stakes slip into?”

I’m glad you asked.

First of all, cardboard templates are your friend. I make mine out of Ram Board, a miracle substance carried by Home Depot.  Every home should have at least one roll.

Here’s what happens.  For every tent stake in the labyrinth I make a pocket, reinforced on each side with a pleat.  When I finish a pocket, I use my handy chart to measure from its center to the center of the next one.  Then I position the template:

Here you can see the center mark:

On either side of the 4-inch pocket, there is a 2-inch pleat.

On the left hand side, things are a little different.  Usually I just mark the 2-inch pleat, but sometimes I have to insert a salvaged piece from an earlier mistake, or I run out of fabric.  Since a bolt of muslin is 25 yards, i.e., 75 feet, and these long walls are 108 feet, this adaptation is inevitable.  We’ll deal with that process in a moment.

Mark the pleats on the bottom and the top, draw lines on either side of the template, then connect the other lines using the template as a straightedge.

As it says on the template, pleat the outside line to the inside line.

Topstitch the pleat on both sides.  I’ve found that it’s easiest/best to topstitch the edge on top, then flip and do the backside.

Here are both pleats topstitched.

To create the pockets, fold the fabric in half and pin both pleats.  Use the other cardboard template to mark two inches down from the top of the pocket.

Topstitch again, this time backstitching both ends of the seam.   This is to keep the stitches from unraveling, of course.  The two inches at the top are for an eventual channel for LD lighting.  That’s right, the 3 Old Men labyrinth will glow in the dark.  It will be beautiful beyond measure.  (I will actually go back and stitch that 2-inch channel across the entire wall, but that may not happen before Alchemy.)

So what about those times when you run out of fabric and have to tack on the next strip? Or where you have planned to insert sections of fabric salvaged from an earlier screw-up of epic proportions?  Here we see my chart of measurements which shows how long each segment of the wall needs to be, plus the ID of each tent stake.  That’s to help me keep track of where I am in the 108 feet.  See the green capital letters?

Those are the salvaged sections, which I measured and labeled:

So when I measure the section before the insert, I mark the left-hand side of the pocket like so:

There’s a 1-inch piece—the bottom of the pleat—then a half-inch section for the seam.  That’s where I cut.

I take the salvaged section and pin it to the wall, wrong sides together:

Stitch it, iron it flat, put the template back into position, and mark the left hand side of the template, i.e., complete the left hand pleat.

The seam allowances are thus concealed within the pleat, and the wall looks as if it’s made from one continuous strip of muslin.

And there you have it.  A long and boring post, you say?  Try doing this process 144 times. Thank you.

—————

[1]  Unless those are the voices in my head. Hard to tell.

New cocktail: the Franco-American

There is, in the inestimable Ultimate Bar Book, a cocktail called The Parisian (p. 200).  It’s equal parts gin, dry vermouth, and créme de cassis.  In other words, it’s a martini with sweetness.

It was OK, but I thought it could be better, and so we now have…

THE FRANCO-AMERICAN

  • 1 oz gin
  • 1 oz Cocchi Americano
  • 1 oz créme de cassis
  • 1 dash lemon bitters

Stir, don’t shake.  (The rule is that if the admixture has citrus juice in it, shake.  Otherwise, stir.)

Cocchi Americano is a vermouth itself, one of those endless parades of aperitifs that will clutter your bar if you start down that path.  It’s very tasty in and of itself.

Not bad at all.  You could lessen the sweetness by cutting the cassis to 3/4 oz, and/or by adding lemon juice.  (But still stirred, not shaken, Mr. Bond.)

It pairs particularly well with a salty goat cheese, which is what we were knoshing on when I mixed this up.

3 Old Men: Labyrinth progress

Take a deep breath.

I just finished the SOUTH — OUTER wall.  That’s all the “short walls” done.

Which means…

But never mind that now.  Here’s a photo of it in semi-action:

My poor labyrinth needs rain, reseeding, and cooler weather.  In the meantime, notice the majestic way the wall marches along, especially in the furthest panels there where the stakes are the actual stakes, i..e, tall enough.

Side view:

Again, the panels on the left are being help up by the actual size tent stakes; further along the wall  is being held up by shorter stakes.

I calculated yesterday that for every bolt of muslin that I split in two, I have sewn the length an entire football field in handkerchief/rolled hems.  So far, that’s three football fields, with three more to go.  That’s just to prep the panels so I can then pleat in the pockets for the stakes.

Likewise, I have used over 20 football fields of thread so far; that will probably end up being closer to 50 than not.

Onward!

3 Old Men: Labyrinth upgrade progress report

You will recall that I received hippie funding to upgrade the 3 Old Men labyrinth from this…

…to this (artist’s conception)…


I am here to tell you that while the sewing is not difficult, it is tedious in the extreme.  I am blogging at this moment in order to avoid going downstairs and prepping yet another bolt of muslin for washing, cutting, and hemming.  Yes, that’s right, I split an entire bolt of unbleached muslin in twain, then handkerchief-hem both sides of both strips.  It takes an hour to do each strip, mindlessless folding 1/4″ hems and stitching them down, yard after yard.

Then the actual sewing starts.  I’ve been working a couple of weeks, off and on, and here’s where I am as of yesterday afternoon:

Oy.

What you see there is about two bolts of muslin.  I bought two more yesterday, and they might be enough to finish the four long walls.

I keep talking about the “long walls” with dread and horror and I’m not sure everyone understands what I mean.  Here is one of the long walls:

It’s over 100 feet long, and it’s one of four.  And while the lesser walls are all symmetrical and made of panels of identical size, the long walls are a mishmash of lengths as they meander inwards across the octagons, ending with those little 9″ panels at the inner entrances.

Oh well.  I knew the job was dangerous when I took it.

Cocktails—a new frontier

I’ve been busy.

First of all, you may recall that I blogged about re-jiggering [see what I did there?] the recipe for a margarita calling for árbol chile tincture, among other twee ingredients.  I am now calling it “Dale’s Magic Margarita” and it’s still tasty.  I double-checked it yesterday.  Okay, I triple-checked it.  It was delicious.

I have planted an árbol chile plant in my herb garden, and it’s started producing.  The internet says that the eftest way to dry the chiles is to put them in your fridge, so I’m trying that experiment.  When the summer is over, I shall have enough chiles to make a lot of the tincture, so…

Guess what everyone’s getting for Christmas?

Side note: I ordered a dozen of the 5 oz bottles.  They’re called “woozy bottles” from the what-else-should-we-call-it cap insert, that little plastic thing with a hole in it that you squirt bitters out of.  However, I just discovered yesterday that these are just the bottles, sans woozies.  I found the woozies at specialtybottle.com, where I can see that I will be spending more money in the future as I pursue my new interest in tinctures, syrups, infusions, and bitters.

Today, I set about making a dandelion & burdock syrup.   D&B, as it is not called in Great Britain, is a soda flavor, and I found a recipe for the syrup.  Easy-peasy, and it’s done.

The reason I wanted to make this stuff is to recreate the Root Daiquiri, an especially delicious cocktail from my favorite bar anywhere, Sovereign Remedies in Asheville, NC.  Their recipe also includes sarsaparilla, but oddly that is not immediately available in Newnan, GA, so my first attempt is without it.  More work is required.

It is nonetheless quite tasty.

Root Daiquiri

  • 1.5 oz rum
  • 1 oz lime juice
  • .5-.75 dandelion & burdock syrup

Shake, pour, and serve.

(By the way, the D&B bottle has chalkboard tape on it you guys!  You can find it—along with whiteboard tape—at Office Depot.  Besides being just cool as beans, it’s also temporary: you can remove it from most surfaces.  In the photo above, I’ve trimmed the edges with deckle-edge scissors because hipster.)

My next venture will be to create a tincture of lovage, a cool herb that is kind of a peppery/celery flavor, from which I will make a lovage bitters.  Don’t ask me how I will use it.

A meditation of sorts

You will be astonished to learn that in the two years since I left the job at GHP, I have at times been feeling adrift. No, really, it’s true.

Some of that stems from learning to deal with the fact that the job I thought I would retire from—and yes, I wanted a party—just vanished without warning. Life goes on and all that.

But there’s more to it than that, and a recent meditation along with my adventure at the Springer Opera House (State Theatre of Georgia) led me to a new understanding of why I sometimes have felt a bit on the lost side. Simply put, my life used to be governed by cycles, and now it’s as open-ended as you can get.

Before, I positioned my “self” according to where I was in the various cycles around me: the school year, NCTC’s season, shows within that season, the church calendar when I was a choir director, and most recently, the GHP nomination/interview/program cycle.

One thing ended, the next began, or began again. That’s what my entire professional life has been like, after all: school, theatre, GHP. That’s 40 years of knowing where I was going to be and what I was going to be doing a year (or more) in advance.

Now? I have no “profession,” no job, and that’s fine. My self-worth is certainly not contingent on where I’m working. But it also means that I don’t know where I’ll be and what I’ll be doing in the future. This is not a complaint, it’s just a statement of facts new to me.

This was driven home one night in Columbus when I was having a drink with Mike Accardo, the Equity actor from Chicago who was so brilliant as Harry Brock, and he commented about jobs coming up and possible jobs after that. He was always looking for the next job, he said; that’s what it meant to be a professional actor.

I allowed as how that was a major reason I never pursued acting as a career; I don’t have what it takes to always be on the hunt—or starve.

And yet that’s exactly where I am now, although without the nerve-wracking pressure of starving if I don’t get out there and hunt. For me, it’s been an existential matter. (Crisis is way too strong a term for my situation.) Before, I cocooned in the eternal circles of my life. Now, it’s a straight path and I am more responsible than not to know where I’m going and where I want to end up.

This situation is probably one reason I’ve started getting more involved in the Burner community here in Georgia: it gives me one cycle that I can depend on and help bring to fruition. I know where I’ll be the first weekend in October and the first weekend in May—and if I go completely nuts, the week before Labor Day, the second week in June, the third week of July, etc., etc.

Anyway, this was not meant to be a cri de coeur. Once it dawned on me the nature of the source of some of my (minor) anxiety, I adapted almost immediately by letting go that habitual expectation of some cycle or other coming to my rescue. It’s all on me now, and that’s a good thing to know.

New labyrinth project, pt. 2

So I went shopping for ideas for materials from which to make the symbols of the four elements on the surface of my new endpoints.

The first idea:

We could set glass beads into the concrete in either the circular or triangular patterns, or…

…since it’s unlikely we’re going to be able to see the colors at night anyway, just use black glass, or…

…just plain black stone.

Next idea:

A 7-inch mirror, which I’d trim to fit the top.  I’m thinking we’d want to use the surface to etch or otherwise attach the symbol, then pour…

…a clear resin on top.

If we want metal, we could use…

…aluminum channel.  It would hold its place and be weather resistant.  With this option, we’d be looking at the triangular symbols only, of course.  (If I chose to go to Hobby Lobby, I think they carry metal sheets; we could cut the symbols out of brass or copper.)

Next idea:

Oven-baked clay—we could make any of the shapes, any color we wanted, including…

…glow-in-the-dark!  There’s something weirdly appealing about making the symbols out of this stuff, then putting them on the mirror and covering them with a clear resin.

Next idea:

The simple, classic mosaic.

And finally for now:

This could be exciting.  This is the stuff that I used on my 3 Old Men staff for my lizard’s eyes, and there are many more options here than just that one product.  Have a look here.

More:

Clear resin, and…

…some other stuff.  Who even knows?

So if we used this, we could have several objects of interest embedded in the labyrinth itself.  Hm.

New labyrinth project, pt. 1

You would think after eight years I would be done with the basic structure of the labyrinth.  You are wrong, of course.  It’s never done.  The trick is not to overload the space.

You already know that the classic seven-circuit labyrinth is basically four lines, each of which curves its way around the center and then ends, forming a turn in the path.

Viz:

Until recently, I capped each endstone with a small wooden block that was painted to look like stone and which had a circle cut into it—I sometimes would place cans of Sterno in those endpoints as little lamps along the way.

However, people kept tripping over them, particularly the southeast one by the firepit, mainly because I had drilled holes in the stones and staked them to the ground with rebar.  So I got rid all of them earlier this year and life has gone on.

I kept thinking, though, that the endpoints needed to be more pleasing visually, and that’s what I’m working on now.

Basic idea: replace the square paving stone at the endpoint with a round paving stone.  Naturally, no one manufactures a round paving stone, at least not in the size that I needed, and so I am casting my own.

Here are my alternate designs:

Pro tip: in Pages, create a layout document, then a circle and a square with white fill.  You can control the size of the circle in the Inspector, and Pages is very helpful about showing you when you have things centered, both on the page and with each other.  Above you can see my templates for circles of 6″, 7″, 7.5″, and 8″.  I decided to go with the 7-inch circle.

Here’s what it looks like in situ:

And from another angle:

Just big enough to tie off the end without being too much big.

Now let me introduce you to a fabulous material:

RAM BOARD!  It’s rough, it’s tough, it’s a huge role of heavy duty cardboard for about $30.  I think builders use it to protect floors as they truck stuff in and out of a site.  I bought it to use in art projects.

Cut out the base of the mold:

Use your handy flexible ruler to measure the length of the arc:

Measure strips for the sides of the mold, remembering to add a one-inch tab at the end:

Use your painters tape to form the sides, then attach to the straight edge of the bottom:

Finished:

All four of them:

And here we pause.  It’s begun to rain, and I have some æsthetics to work on.

The simplest plan is simply to insert these into the ground and fill them with concrete.  The cardboard may or may not disintegrate—who cares?

But wouldn’t it be neat if I embedded something in the surface?  I’m thinking the symbols of the four classical elements: fire/water/earth/air, just like the sculptures at the four points of the compass are now.

Here are two versions of the symbols:

One choice to make is between the triangular and the circular versions.  The problem with the triangular ones is that they are reversible—the seeker would never be quite sure if the turn he is making is around fire or water. That is a problem, right?  The circular ones at least remain the same no matter which direction you’re approaching them from.

However, depending on what materials I find when I hit Jo-Ann’s, the triangular ones might be easier to make.  (My original thoughts were to use brass or some metal items.)

Also however too, it occurs to me that it might be the best thing ever if I were to make the circular ones out of resin of some kind, glass even, and let those be the absolute top of the endpoint stones, i.e., you wouldn’t see concrete, just the glass symbol.

Hm.