You would think after eight years I would be done with the basic structure of the labyrinth. You are wrong, of course. It’s never done. The trick is not to overload the space.
You already know that the classic seven-circuit labyrinth is basically four lines, each of which curves its way around the center and then ends, forming a turn in the path.
Viz:

Until recently, I capped each endstone with a small wooden block that was painted to look like stone and which had a circle cut into it—I sometimes would place cans of Sterno in those endpoints as little lamps along the way.
However, people kept tripping over them, particularly the southeast one by the firepit, mainly because I had drilled holes in the stones and staked them to the ground with rebar. So I got rid all of them earlier this year and life has gone on.
I kept thinking, though, that the endpoints needed to be more pleasing visually, and that’s what I’m working on now.
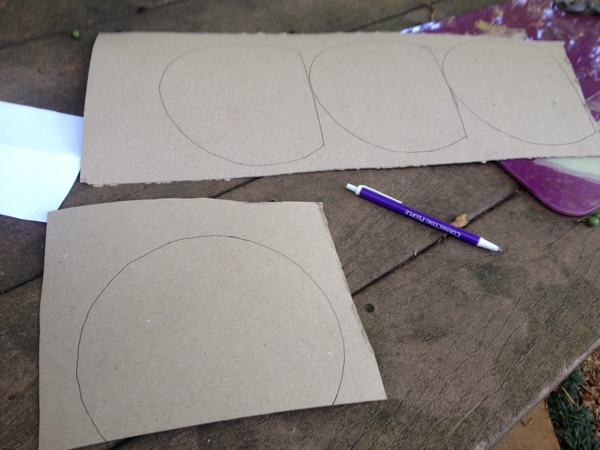
Basic idea: replace the square paving stone at the endpoint with a round paving stone. Naturally, no one manufactures a round paving stone, at least not in the size that I needed, and so I am casting my own.
Here are my alternate designs:
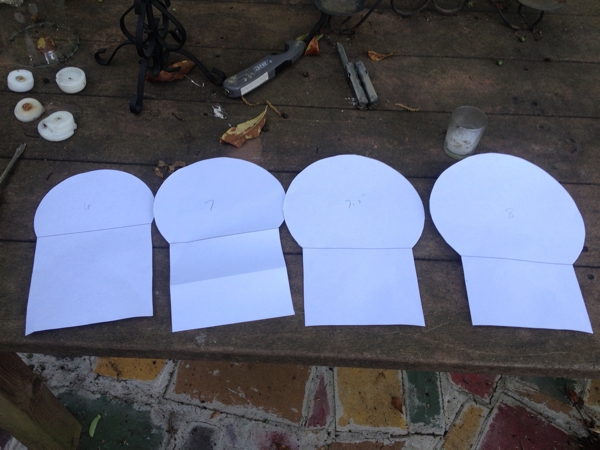
Pro tip: in Pages, create a layout document, then a circle and a square with white fill. You can control the size of the circle in the Inspector, and Pages is very helpful about showing you when you have things centered, both on the page and with each other. Above you can see my templates for circles of 6″, 7″, 7.5″, and 8″. I decided to go with the 7-inch circle.
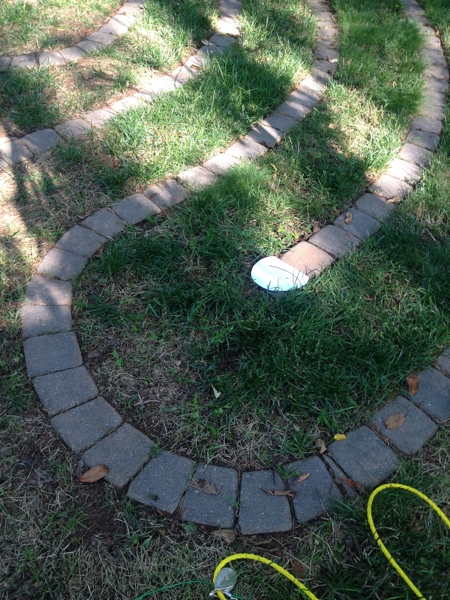
Here’s what it looks like in situ:
And from another angle:
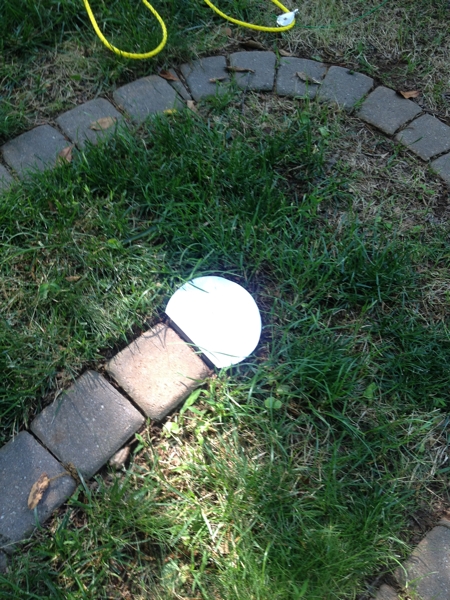
Just big enough to tie off the end without being too much big.
Now let me introduce you to a fabulous material:
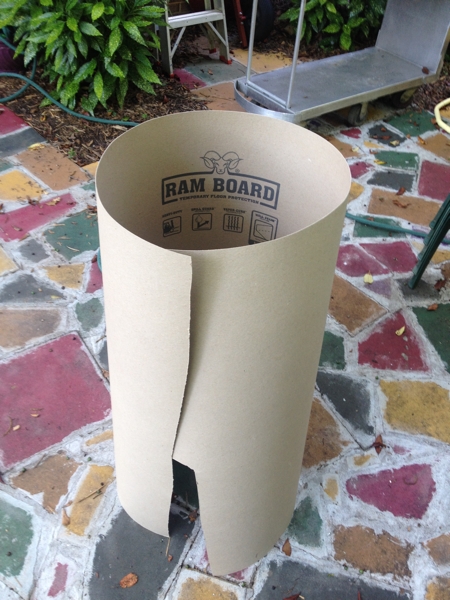
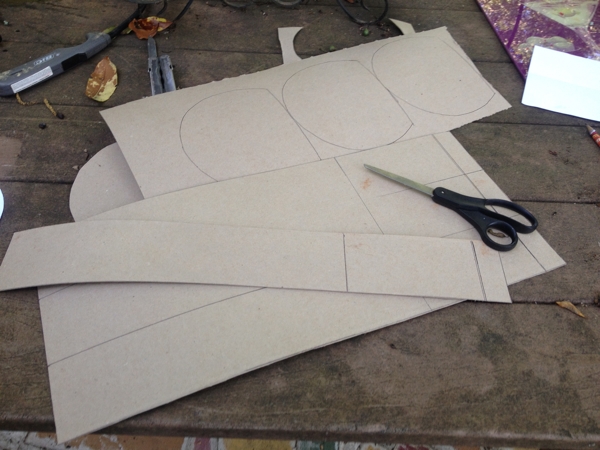
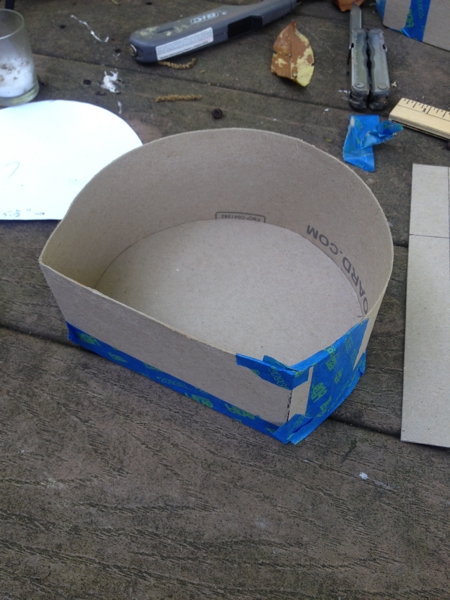
RAM BOARD! It’s rough, it’s tough, it’s a huge role of heavy duty cardboard for about $30. I think builders use it to protect floors as they truck stuff in and out of a site. I bought it to use in art projects.
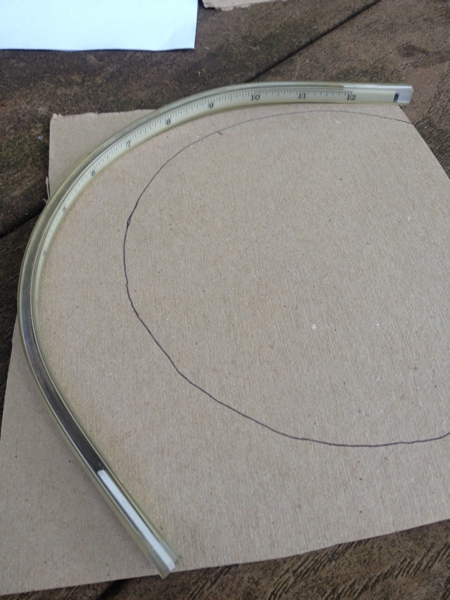
Cut out the base of the mold:
Use your handy flexible ruler to measure the length of the arc:
Measure strips for the sides of the mold, remembering to add a one-inch tab at the end:
Use your painters tape to form the sides, then attach to the straight edge of the bottom:
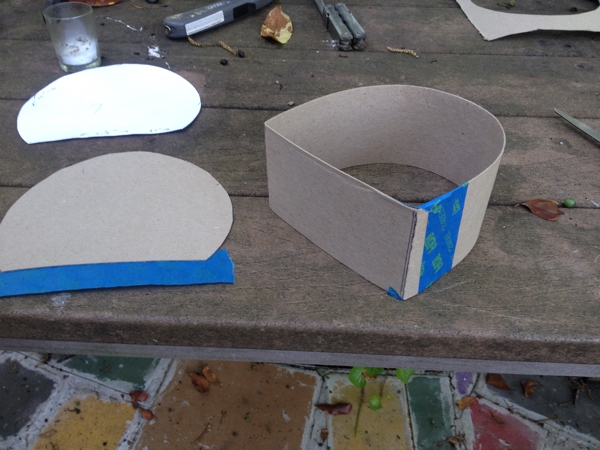
Finished:
All four of them:

And here we pause. It’s begun to rain, and I have some æsthetics to work on.
The simplest plan is simply to insert these into the ground and fill them with concrete. The cardboard may or may not disintegrate—who cares?
But wouldn’t it be neat if I embedded something in the surface? I’m thinking the symbols of the four classical elements: fire/water/earth/air, just like the sculptures at the four points of the compass are now.
Here are two versions of the symbols:
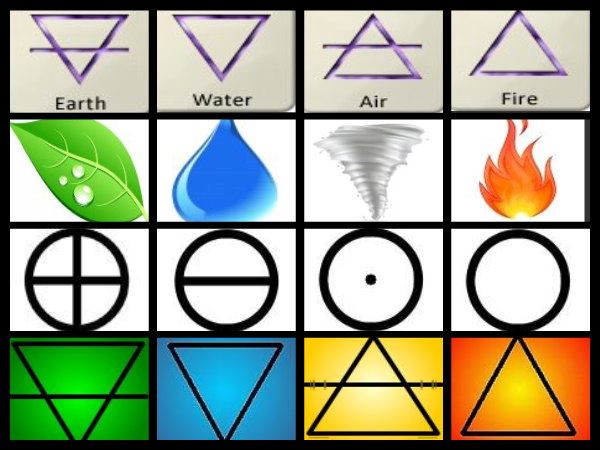
One choice to make is between the triangular and the circular versions. The problem with the triangular ones is that they are reversible—the seeker would never be quite sure if the turn he is making is around fire or water. That is a problem, right? The circular ones at least remain the same no matter which direction you’re approaching them from.
However, depending on what materials I find when I hit Jo-Ann’s, the triangular ones might be easier to make. (My original thoughts were to use brass or some metal items.)
Also however too, it occurs to me that it might be the best thing ever if I were to make the circular ones out of resin of some kind, glass even, and let those be the absolute top of the endpoint stones, i.e., you wouldn’t see concrete, just the glass symbol.
Hm.
One thought on “New labyrinth project, pt. 1”