3 Old Men: the skirt (day 4)

So I rebuilt the sashes, and they work much better.

The new layout:

I laboriously cut the monks cloth along the weave, serged the edges, and basted it onto the lining.

I gave myself a broader strip in which to enclose the piping.

Et voilà!

They’re much cleaner with no loose edges to torment me.

In other news, I took a deep breath and finished the waistband and attached it to the skirt.  I’m all done except the center back seam, which I will do today.

However.

I pinned together the waistband in the back and tried the thing on.  I am not at all pleased with the results.  The waistband is a marvelously beautiful piece of work, but it’s too bulky.  I’m going to have to play with it more, especially this weekend when the Old Men meet to put together the labyrinth for the first time and test drive the ritual.

And no, I am not posting photos of the skirt in situ, as it were.  You will have to attend a Burn to see that.

update, 9/12/14: After working with a couple of entirely new designs, I revisited my finished skirt and decided to try just cutting off the top three inches of the waistband, i.e., the floppy, un-rollable mess.  Et voilà, it worked.  The result is clunky in a really groovy neo-Phoenician way.  I think the team is going to approve.

3 Old Men: the skirt (day 3)

It’s awfully useful being a polymath, don’t you think?  For example, once you understand that a doughnut is the same as a coffee mug, then it’s just a short jump to sewing.

Because one thing that fascinates me about costuming was how you can take a variety of oddly shaped and definitely flat pieces of fabric…

…and turn them into…

It has never failed to amaze me.

So it’s a good thing that I have a spatially oriented science-fu brain, because today nearly drove me around the bend.  I can’t imagine trying to figure this out without a lifetime of watching spheres turn inside out.

I was working on the sashes for the waistband.  The hard part was that we—and by that I mean Craig—decided that we needed a strip of color on the sashes.  That means covered piping, plus a lining to give the monks cloth enough body to survive being tied repeatedly.

Here are three of the four colors:

Here’s what makes this hard: the sash is sewed as a tube, then turned inside out.  (See the belt loops for a simpler example.) That means you have to figure out how to enclose the piping along the seam so that when you turn the whole thing inside out, you get a flat sash with the colored piping emerging from the seam.

I sketched some possibilities, but mentally I knew they wouldn’t reverse properly.  Finally I had to build a prototype out of muslin:

See the circled part?  That’s the casing for the piping.  [N.B.: Jobie is not allowed to comment on this photo.]

When you turn this inside out, it looks like this:

So that works.

First step is to baste the piping into its casing:

Then apparently magic happens, because I have no photos of the layering/ironing/pinning process.  It was not fun.  I have decided that I will be a) serging the edges of all pieces of  monks cloth; and b) basting them onto the lining.  Otherwise, there are too many loose edges that don’t get caught up into the seams.  In fact, if I serge the edges of the monks cloth—just now realizing this… doh…—I can just straight stitch the whole thing.

(Now I’m wondering if I need to back up and re-do my sashes…)

Here it is, unturned:

Again, Jobie is not allowed to comment.

And what does it look like when finished?

It really is pretty.  But I think I’m going to remake them tomorrow.

3 Old Men: Skirts (day 2)

So I didn’t document the first day.  Sue me.

I went to draft the pattern for my skirt, and I knew that something about the topology of the waistband was not going to be right.  I had been drawing it attached to the skirt itself, i.e., all one piece, just because I was hoping to have an easy job of it.

But of course—and especially given the redesign I had to come up with—the waistband had to be a separate piece.

The aforementioned redesign:

There will be two separate sashes (more about which tomorrow) that will be sewn into the two outer buttonholes, then weave their way across the front, go around the back through the belt loops, and back to the front, to be tied through the front loop.

So each waistband will have three belt loops, six faced buttonholes, and two sash halves.

Here we go.  First, the belt loops are lined with muslin for a little sturdiness.  I’m making two huge lengths and then cutting off what I need.  Here they are all pinned:

And heavens bless my old friend Stella Lang, who loaned me her serger for this project.  Here’s the above edge all serged:

That may be hard to see, but with a fabric like monks cloth, serging is a must.  Otherwise the stuff just unravels.

That tube now gets turned inside out, pressed flat, and topstitched on the sides:

I cut out 28 rectangles of muslin—planning ahead, since each skirt will need six, and there are four Old Men in the troupe.  Marked them where the buttonhole will go, and positioned them on the waistband:

I feel like Marcel Duchamp, except that he had the luxury of randomosity.

Those get zigzagged down and up: 1

Those get slit, and we add the belt loops:

Those facings get turned through to the back:

Tomorrow I will topstitch around the buttonholes, create the sashes, stitch those in, probably topstitch across the middle of the waistband, then add a backing layer of monks cloth.

Easy, right?  And I only have to make three more!

—————

1 Actually, I should have just straight-stitched them in a rectangle around the cutline; it would have made for a tidier turn.  But on the whole I’m going with overkill with this monks cloth.

3 Old Men: the staff (day 6)

Here are today’s aesthetic materials: copper tacks.  I found them online.  First I ordered the ones on the left, but when they came they were so tiny that I feared they might not be sturdy enough to hold the lizard onto the staff.  I then ordered the ones on the right, only to find once I had the lizard designed that they were too big.

Let’s pause for a moment and consider MOOP.

MOOP stands for Matter Out Of Place, and it’s a huge no-no in Burner Land.  Out at Black Rock City, the federal Bureau of Land Management (BLM) allows the festival to leave behind one square foot of debris per acre; more than that, and the annual permit is not renewed.  As you can imagine, BMOrg is very serious about the Leave No Trace principle.

The 3 Old Men experience was designed from the very beginning to be as MOOPless as possible.  Originally, you may recall, it was just me, Craig, and David traipsing across the Playa in loincloths and staves.  No MOOP at all to speak of.

When the labyrinth was added, MOOP was one of my overriding concerns: it all comes out of a crate, gets set up, and all goes back into the crate.  No fiddly bits, no moving parts, no feathers, no sequins.  No MOOP.

So here I am about to use these tiny little copper tacks to affix my lizard, and all I can think of is that these little buggers are just MOOP waiting to happen, if they don’t hold.  And while out at the Playa it might be perfectly easy to sift the dust to find them, somehow I’m thinking that the farmland of Alchemy might be more of a challenge. Spoiler alert: they seem to be working just fine.

The little tacks are pure copper; the larger ones are copper-plated steel or zinc.  This means the little ones are a lot softer than the big ones, and a little experimentation showed that it would be more efficient to pre-punch holes in the lizard, especially at the folded-under edges:

And here we are, all punched and ready to go.

I had the presence of mind, two or three sessions ago, to mark the correct position of the lizard with little dots of magic marker, and they still showed through the blue stain quite well.  (The cerise surface is a yoga mat, which is sitting on a towel.  This cushioned the staff against scratches as I tapped tacks in.)

The first tack:

And done.

In the process, about an eighth of the tacks bent or otherwise failed and had to be discarded.  Since there are about 1,000 tacks in the box, I was profligate in my rejection.

Here’s what it looks like.

And in its natural habitat, i.e., raised aloft:

I will now let it sit there and annoy me for a month or so.  I really think I need to make the eyes and the stripe more more somehow.  Remember that the ritual will often take place at night, and so more definition of those details might be important.  I don’t know.

Also, I keep thinking that I can/should use some of the remaining tacks to create more decoration on the staff: lines, swirls, waves, etc.  Something along these lines, perhaps.  But all those tacks… the specter of MOOP haunts me…

3 Old Men: the staff (day 5)

Nearly there!  Yesterday was the most nerve-wracking of the construction steps for my staff, since the lizard is the main design element and I was fearful of “messing it up,” a perfectly meaningless concept of course.  But still.

Here is the design:

It will be made from copper sheeting, which I just happened to have lying around.

I would like to point out that I bought this from Hobby Lobby years ago, before they revealed themselves to be Dominionists of the worst sort.

All laid out and ready to go:

After outlining the design in marker, I went back with a ballpoint pen and traced the center stripe and the eyes, embossing it into the copper.

Halfway cut out.

Notice that I leave a margin around the outline.  This is because there may or may not be intoxicated individuals near the staff, and I’m thinking that SWIM1 would be loath to seek medical attention if my their hand were sliced open by sharp lizard edges—so I designed it to have a turned-under edge.

You may have noticed that the feet seem to be simple, spade-shaped affairs.  Not so: they will be clever little lizard fingers, but I was concerned about how best to make those.  Therefore, a test foot:

After marking them, I embossed the outline of the fingers, thinking that would make it easier to turn the edges under.  As it turned out, that step was not necessary.

The finished fingers looked very nice I thought.

I will say at this point that the proper tools—which we have discussed previously—are always a blessing, and turning under a small band of copper like this necessitated a trip to Michaels, where I bought some jewelry-making tools:

The super-thin needlenose pliers were particularly and spectacularly helpful.  Here’s the beast all turned under except for the fingers:

And here he is all done.

The final phase is to attach him to the staff.  I say “final,” but there are other options to think about: does he need jeweled eyes?  Also, I have in mind that it might be necessary to further decorate the staff as a whole… well, you’ll see.

—————

1 “Someone Who Isn’t Me”

3 Old Men: the staff (day 4)

Our lizard has undergone some weight reduction:

He wraps around the staff much more prettily now.

Here’s our next set of materials:

Copper, brass, and aluminum wire.    Not sure about the brass, but I felt that three metals/colors were required.

These are to create the required markings for the staff.  Remember the grooves?

I drilled a tiny hole in the groove, and then wrapped the wire around the groove.  When it was filled, I drilled another tiny hole and stuck the end of the wire in.  With a lot of luck, it won’t come undone and poke me in the eye.

Here’s the best shot I could get of the whole thing:

It’s pretty cool looking, I think.

Next is creating the lizard and attaching it to the staff, and then I have to do some thinking about further decoration.  You’ll see what I mean after I get the lizard on there.

In other news, one day recently I was out in the labyrinth and right before my eyes a branch holding some bells and a lamp made from a wine bottle  crashed to the ground.  It was not unexpected—I had noticed that the branch was dead and was twisting lower and lower.  The wine bottle thing broke, alas, and quite surprised the wasps who were building a nest in it.

So I had to figure out what to do about the bells.  There really aren’t low-hanging branches in the labyrinth, not ones that will support cast-iron bells anyway.

I couldn’t really figure out an attractive solution, so here’s what I ended up with:

I had bought two poles back when I was starting my Old Man staff ideas, so I took the other one and painted it dark green.  I’ve lashed it to the tree with camouflage rope—yes, that’s a thing—and hung the bells from that.

It’s not pretty at all, but it will have to serve until I get inspired.

3 Old Men: the staff (day 3)

Time to stain the staff, and no, that’s not a euphemism, Jobie.

Here we see my system in all its perfection functionality.  The pole on the left is for another project altogether that I hope to get to tomorrow. On the right, we have my Old Man staff.

After one coat of stain:

After two coats:

And that’s it, folks.  I can’t really make watching paint dry interesting.

In other news, I was able to borrow a serger sewing machine from one of my oldest friends, whom I’ve known since first grade at Elm Street more than 50 years ago.  (That still make me feel funny when I say it.)  I should be able to get the skirts at least started this week, and by started I mean cut out and the edges of those huge pieces of fabric serged.  The actual assembly of the skirts will probably have to wait until I’m back from the beach.

3 Old Men: the staff (day 2)

Art is an ugly ugly business, you guys.  It just lies there, laughing at you, taunting you with its eternal and unattainable perfectability.  And you should try doing it on a curved surface sometime.

Here we see the staff wrapped in a rectangle approximately 4.75 inches across, that being the circumference of a 2-inch circle—despite my earlier calculation of 6.25 inches.  Don’t know who did that math.

I had found an image of a lizard that I liked, but it didn’t really work when I wrapped it around the staff, and so here I am free-handing the design onto the staff.  The problem is that there’s not a lot of room in less than five inches; the lizard’s claws kept overlapping.

Anyway, eventually I just traced it in marker and cut it off:

You see what I mean about art being ugly.  And the round surface—the poor thing doesn’t even have a right front limb.  It looks decapitated as well, mostly due to the fact that my original concept had the animal kind of draped over the top of the staff, i.e., the body going up one side and the head coming down the other.  But there was no room.  That’s why the creature’s left limb looks as if it’s been broken—I was trying to fit the claws in around the head.

So out comes the tracing paper:

You will recall how yesterday I referenced the joy of having the correct tools.  This is certainly the case with me and art supplies; for almost any project you can imagine, I have what we need.  Earlier this year, in fact, I swore an oath that I would make time each day to “waste art supplies.”  If I had actually done it, I would have had enough art supplies to last quite some time.  But I haven’t done it.  Good thing I didn’t blog about it.  (Or maybe not making it a public thing is why I didn’t do it…)

So this guy gets cut out, wrapped around the staff, and tinkered with.  I spent a lot of time making sure that he was “anatomically correct,” in the sense that the legs are in opposition.  I actually sliced off all four limbs and retaped them at different angles in order to get them to fit on the staff.  And it still didn’t match the mythical fuzzy image somewhere in my head.

And a final re-tracing:

You’ll notice that even in this “final” tracing, I’ve redone the right hind limb in red pencil.

I think what’s going to happen next—other than staining the staff—is that I’m going to make the lizard thinner, which would create space between the claws on the far side of the staff.

Don’t look.  It’s ugly.

3 Old Men: the staff (day 1)

In an alternate universe, I would be nervously packing and repacking for to leave for Burning Man next weekend.  In this one, I’m just now getting started on a couple of items for Alchemy, the north Georgia Burn in October.

Each officiant in 3 Old Men is responsible for creating his own staff.  (Quick recap: the bare-chested officiant wears a long ceremonial skirt of monks cloth and carries an 8-foot staff.)

The staff must be eight feet long with specific markings:

The markings are specific because we use them to lay out the labyrinth.  The center of the labyrinth is an octagon eight feet across, so we lay out four staves in a square.  The 22-1/8” markings are the corners of the octagon, and from there we can stake out the center.  We’ll be laying out the center of each axis, and from the center mark on the staff, the 3′ and 5′ markings give the edges of the path.

Within this framework, though, it is up to each man to create whatever staff he wants to hold.

So with that background, here’s the first installment of the making of my staff.

My base is nothing more than a 2-inch round from Home Depot.  I’m going to be staining it, and so my first step was to build some stands to hold it off the tarp when I do that.

It was great fun dragging out my radial arm saw and my drill press.  As my friend Craig says, having the right tools is a joy forever.  Of course, he has this sizable quonset hut on his property with a real shop, so his joy is even greater than mine.

Still, it took no time at all to cut up a 1×6 into pieces, drill a 3-inch hole in some of them, split them, and then nail them to the bases.  I ended up with eight of them, so we could actually gussy them up a bit to serve as actual ceremonial pieces to hold our staves.

In action:

You can see the markings on my staff.  Close up:

I went out to Craig’s nifty workshop, and he rabbeted out those grooves for me.  I shan’t explain them.  I think I’m just going to show you each step of the process and let the staff grow for you as I work on it.
I sanded the staff, and thus endeth Day 1 of the making of the staff.

Body paint

Those of you who have been reading along can skip this post.  This is for those who, like me, were looking for a cheap white body paint they could make at home for whatever reason.  I’ve tagged the post so that perhaps it will show up in searches.

Brief history: I and my compadres in the 3 Old Men ritual troupe needed a cheap white body paint.  There is no such thing as cheap commercial body paint, and so I had hoped that the intertubes would provide me with a recipe to make it myself.

Alas, all internet recipes I found were completely ineffective.  They were based on cold cream, which would have been problematic in Nevada’s Black Rock Desert anyway, but worse, they weren’t actually white.  I regard the accompanying photos of happy, whitefaced children as fraudulent.

Luckily, here in Georgia we mine kaolin, a white clay used for various industrial purposes such as making paper white and shiny and for Kaopectate.

Knowing that some people eat it for whatever reason—you can go do that research yourself if you like—I figured it would be available somewhere around here.  I asked the Facebook and got more than a couple of kaolin resources, the best of which is a nearby grocery store, where it sits in the produce section:

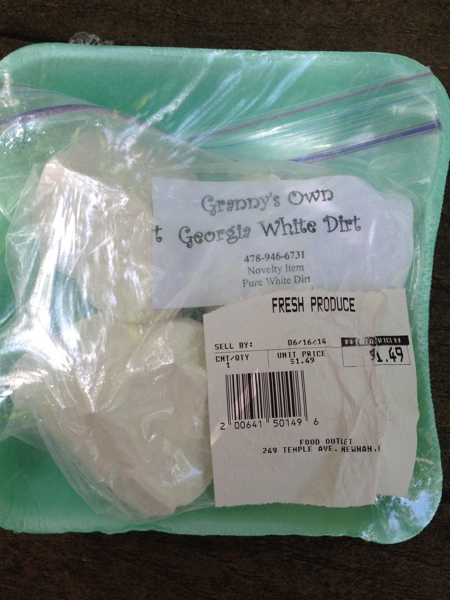
You thought I was kidding, didn’t you?  Yes, the price is $1.49 for about a pound of kaolin.

So here are the instructions to make an incredibly cheap white body paint based on my experimentation.

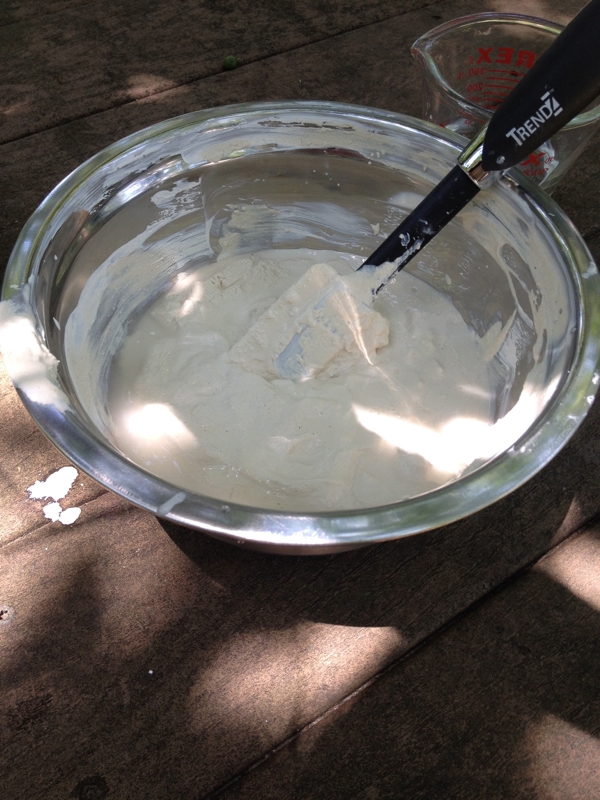
Dump your kaolin into a bowl and add 1-1/2 to 2 cups of water to it.

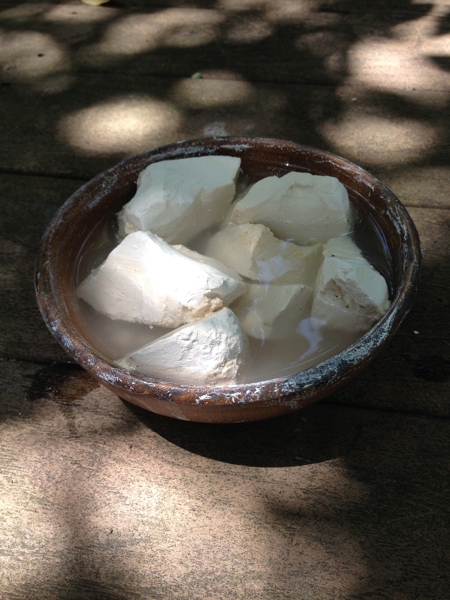
Just let it sit for about half an hour, stirring occasionally.  You will want to use a little larger bowl than I have here, and my advice is do this outside.  It can get very messy very quickly, and as you will discover, a little bit of this stuff can go a very long way.

Add water if necessary:

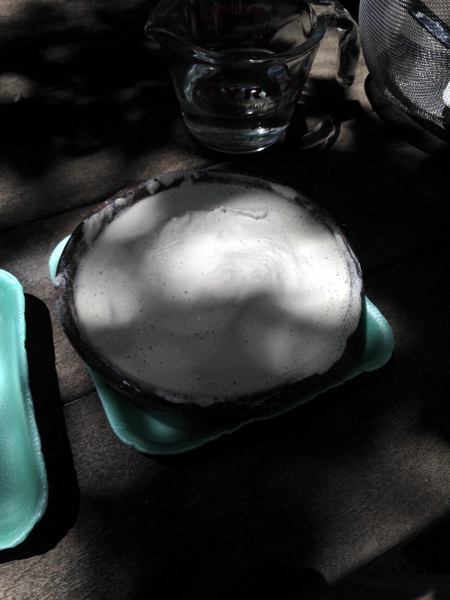
It should be the consistency of sour cream.

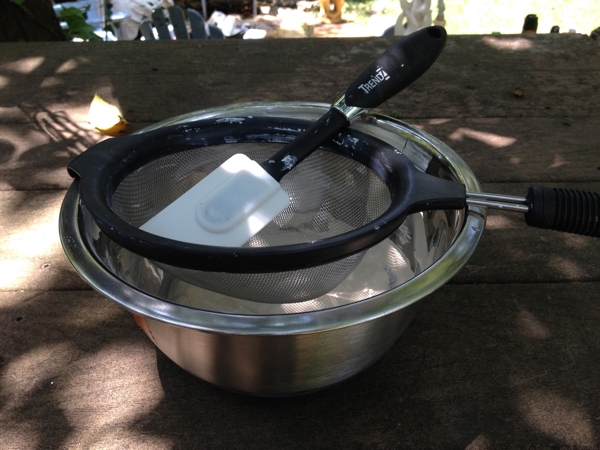
Buy yourself a bowl large enough to hold your final mixture; a strainer that will hook over the bowl; and a spatula, one that is completely flat on its face (unlike mine).  It is possible to use your household utensils, but if you’re going to be making a lot you will want dedicated equipment so that you don’t have to completely clean the kaolin off of every nook and cranny.

Scoop the goop into the strainer, and force it through with the spatula.  The finer mesh your strainer had, the finer your body paint will be.

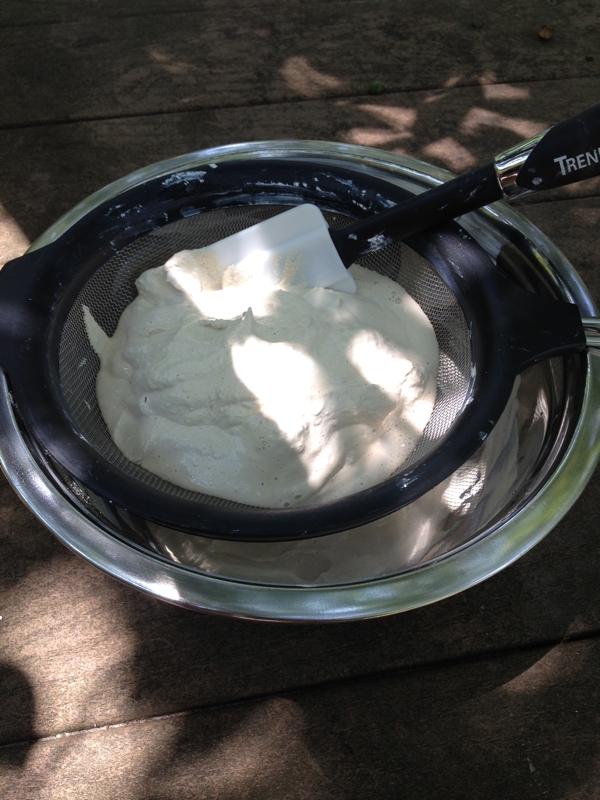
As you moosh it through, you may need to add water for any clumpy bits.  Also, of course, it doesn’t fall straight into the bowl.  A lot of it will cling to the other side of the strainer, so be prepared to scrape the bottom:

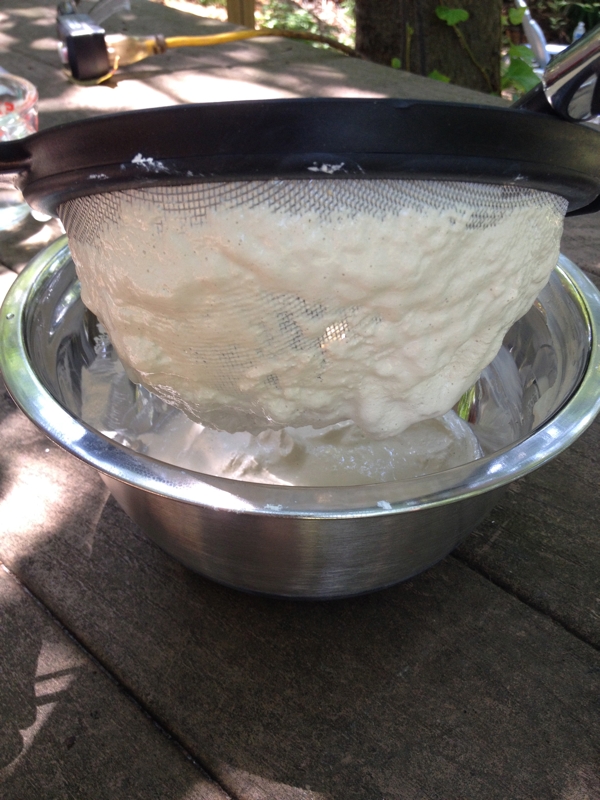
Finally, you will have a bowl of white, yummy kaolin.  Stir, add water, etc.

I was smart to buy a stainless steel bowl with a rubberized bottom, but I wish it had come with a lid.  You will want to keep it covered to keep it wet, although if it dries, it’s not difficult to reconstitute it.

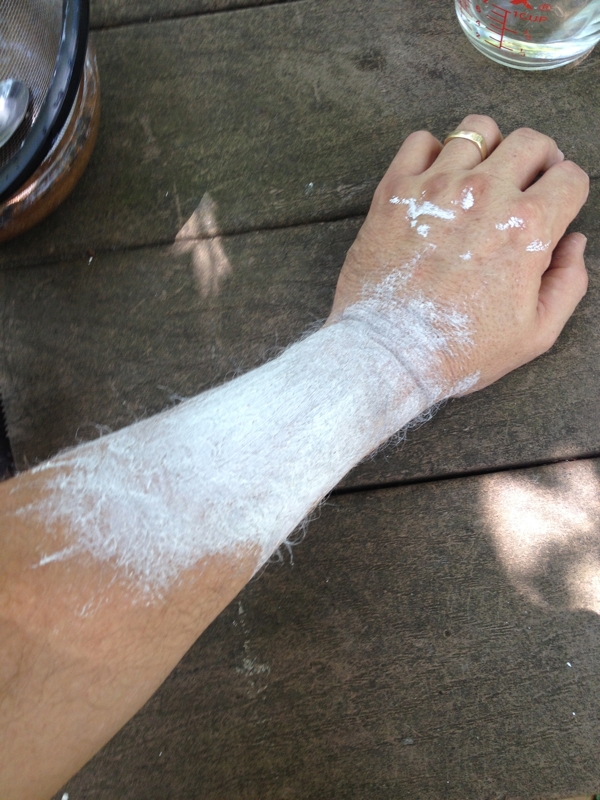
How well does it cover?  Here’s about a teaspoon smeared on my arm, still wet:
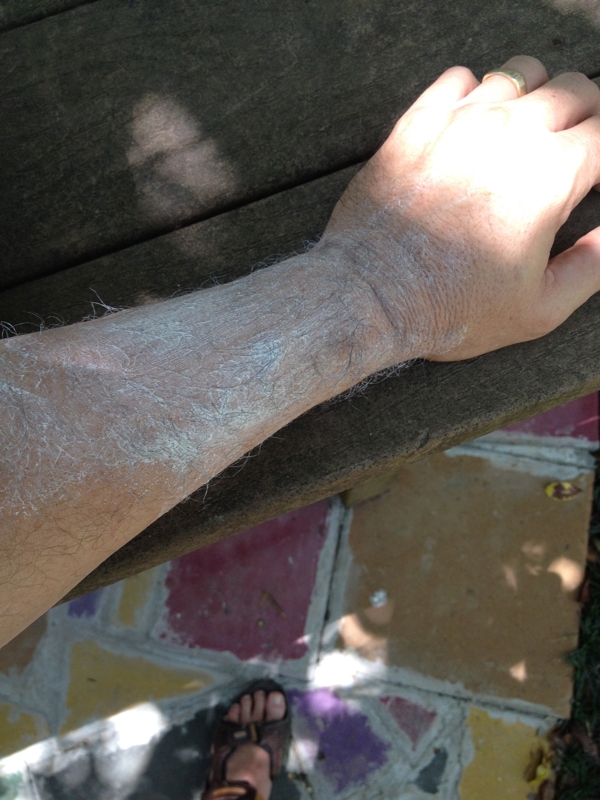
And here it is dry:

Used in a fairly liquid state, it dries smooth and does not come off.  If you don’t use as much water, it may cake and crack—that’s a definite look as well.

It’s comfortable on the skin, and best of all it just rinses right off.  Pretty much perfect: cheap kaolin, water, comfortable, and removable.

Unanswered questions: how much does it take?  I started with a pound of the stuff, and I covered my entire body with maybe a fifth of it.  However, that was the first formulation, which was thicker and cakier, so it ought to go even further if you use a runnier consistency on fewer body parts.

Also, I don’t know whether this could be tinted or not.  I’m sure you could use food coloring, but you would risk dyeing your skin.  Perhaps sidewalk chalk or tempera paint?  I may or may not play with that; we just needed white.

Could you add cold cream to it?  I don’t see why not, but why go greasy when it’s perfectly comfortable the way it is?

Finally, there are online sources for kaolin, but it’s not cheap like that.  My advice would be to start checking around convenience stores and groceries that cater to the African-American community; it is mostly older black ladies who eat “white dirt.”

Bottom line: you can spend $12.95 for 4 oz. of body paint, or you can spend $3.00 for a pint.  You’re welcome, internet.