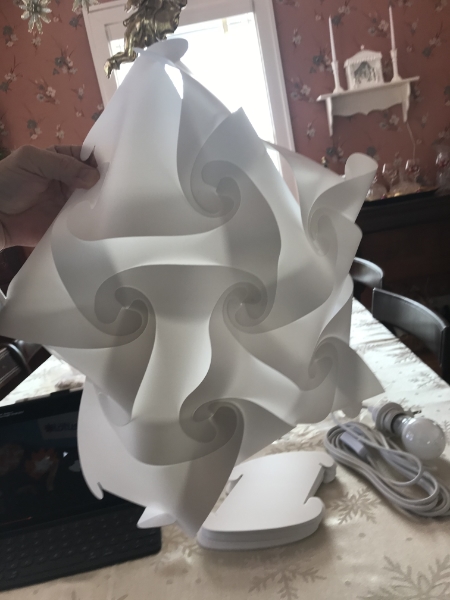
You will recall that we spent a weekend in Quebec and that I came home with this:[1]
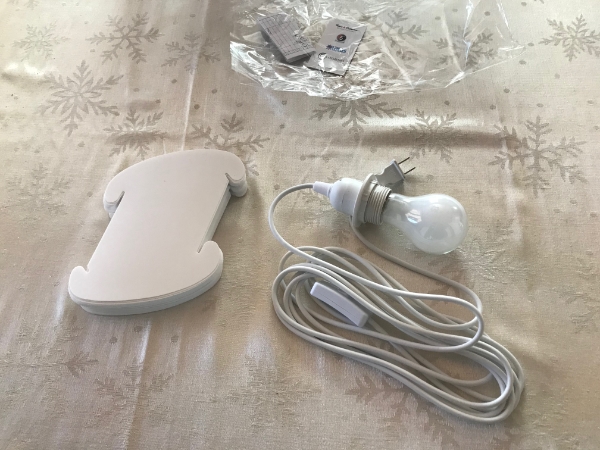
Now its secrets will be revealed. This is a lighting fixture that I bought at Rare & Different,[2] the fun store next to the CHRISTMAS BOUTIQUE, KENNETH, on rue De Buade. It’s full of these bizarre lamps, all different shapes and colors, and all inexplicably beautiful and fascinating, and all made from the vinyl pieces you see above. If you’re from the area they will build your selection for you while you wait or shop, but if you’re from away you have to take the pieces home and build it yourself.
Here’s how it works: when you’re home and ready to assemble your lamp you email the address on the business card, including the receipt number of your purchase. They then send you the link to two videos: the first one explains the vocabulary they’ll be using (“right/left-leaning,” “rosettes,” etc.) and the mechanical strategies of assembly; the second is specific to the model you picked out. Both are very well done, narrated by Marie-Josée (MJ) Bouchard in a careful yet firm manner.
The concept is enough to make a math major drool: each piece slides into another, like so:
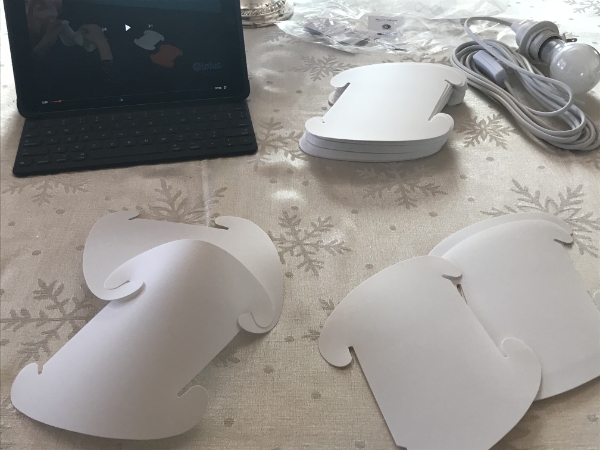
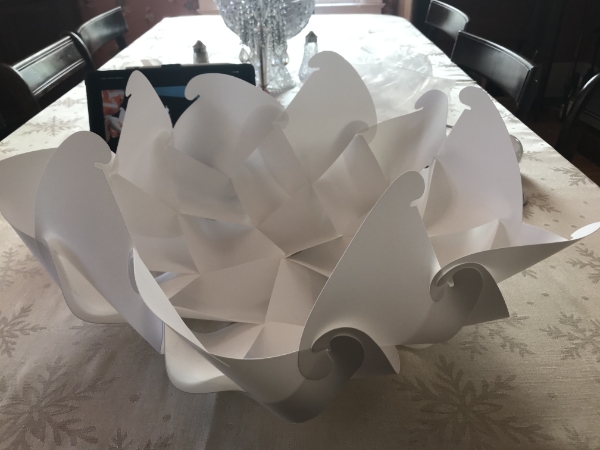
As you can imagine, the lamp is built in layers. My model is the “Saucer,” which MJ pronounces charmingly as “sow-ser.” Here’s the first layer of five pieces:
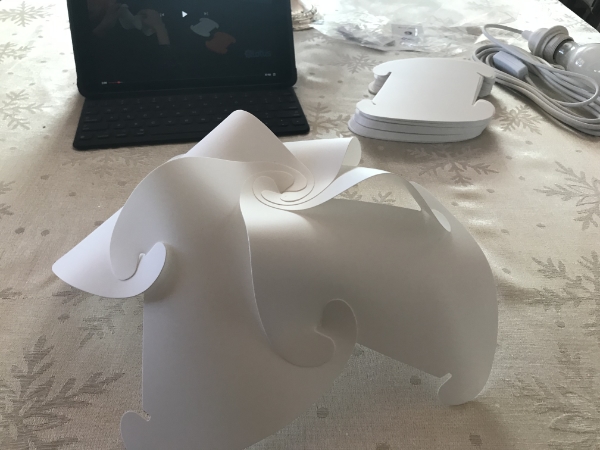
And flipped, ready for Step 2:
Here we are after Step 2:
You can see how fascinating the concept is. Imagine a store full of these things, all sizes and shapes—your brain really cannot distinguish which pattern is which or which one is going to be the most fascinating when you get it home.
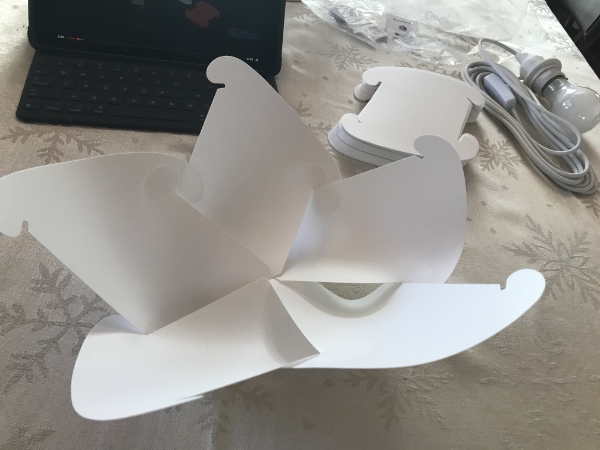
Stage 3:
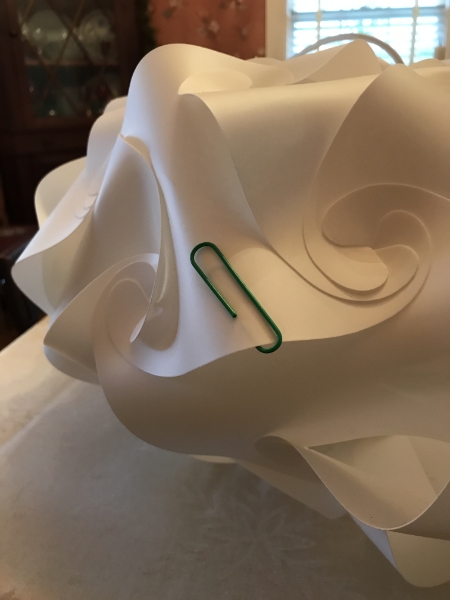
In the video, MJ is working with alternating colors on each step so that you can see what goes where. This does not help those of us assembling a pure white Saucer; at Step 6 I got lost every single time. Step 5 was made up of alternating left- and right-leaning pieces, and Step 6 involved adding two pieces to every left-leaning piece. After starting over for the fourth time, I had a scathingly brilliant idea: add a colored paperclip to the left-leaning pieces. That way, I could tell a) which were the left-leaning pieces without peering intently at the things; and b) which piece I started with as I worked my way around.
I still got lost a couple more times before I got it right. Part of the problem is that as you start closing the top, the tension between pieces becomes greater and unfinished rosettes will come undone. That presents difficulties in recognizing where the next piece goes: does it just hook up with its neighbor, or were there supposed to be two “petals” already there?
Finally, though, I triumphed: Step 6, and the ultra-difficult Step 7 to close the top and install the lighting fixture.
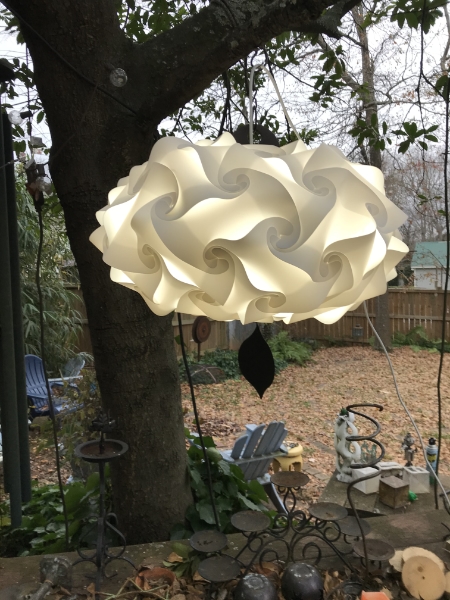
Et voilà:

In its natural habitat:
And a video:
No, I’m not leaving it out in the weather (although the shop maintains that the lamps are good for outside). I will store it inside and take it out to install it over the worktable whenever we’re out there of an evening.
So: great lamp, interesting assembly, 10/10 would do it again.
—————
[1] Plus gin.
[2] I would link to the store’s website, but there is literally nothing there but the store’s name and a map.
I didn’t know Georgia O’Keefe dabbled in lighting design.
More like Escher.